
How to use iMessage on Android with AirMessage and a HostMyApple Mac Cloud Server
iMessage is the gold standard when it comes to text messaging. It's fast, secure and oh wait.....it only works on iOS devices! Bummer Android fans.
Thankfully we now have a solution called AirMessage. AirMessage is a solid implementation of iMessage designed specifically for Android devices.
Once you have it setup, be sure to check out the awesome features of iMessage with AirMessage such as read receipts, message effects, tapbacks and stickers!
All you need in order to get AirMessage (iMessage) up and running on your Android device is:
- An Android device
- A MacOS Cloud server or local Mac device.
Step 1: Setting up a Mac Cloud Server to run AirMessage.
Visit www.hostmyapple.com/mac-vps-hosting and select one the available Mac cloud hosting packages.
AIrMessage is pretty light weight so we recommend the "macOS Lite" package.
There's a special promo just for AirMessage users, use promo code "airmessage" for 10% of the life of the server!
Once you've signed up you will received your macOS cloud server login details via email.
This will also contact full instructions on how to connect with NoMachine, the preferred remote desktop application.
Step 2: Installing AirMessage on the Mac Cloud Server:
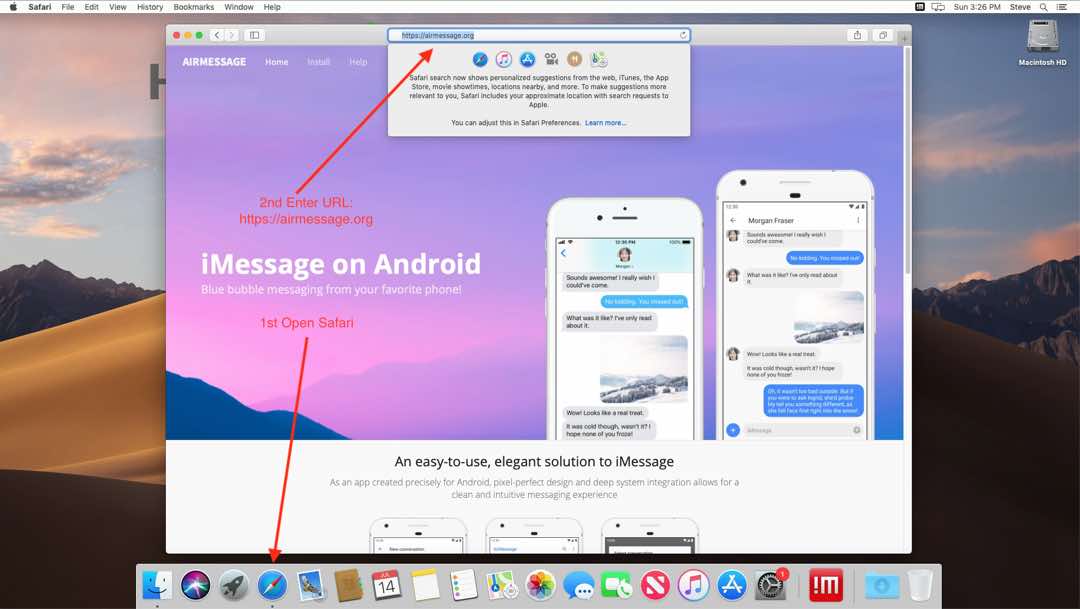
2a: Once connected to your new macOS cloud server open up Safari and visit https://airmessage.org
2b: Scroll down to the bottom and locate the link "AirMessage Server for macOS":

2c: Open "Finder" from the macOS dock, then click the "Downloads" folder. You will find the copy of AirMessage server that you just downloaded.
Simply drag and drop the "AirMessage" file into the "Applications" folder.

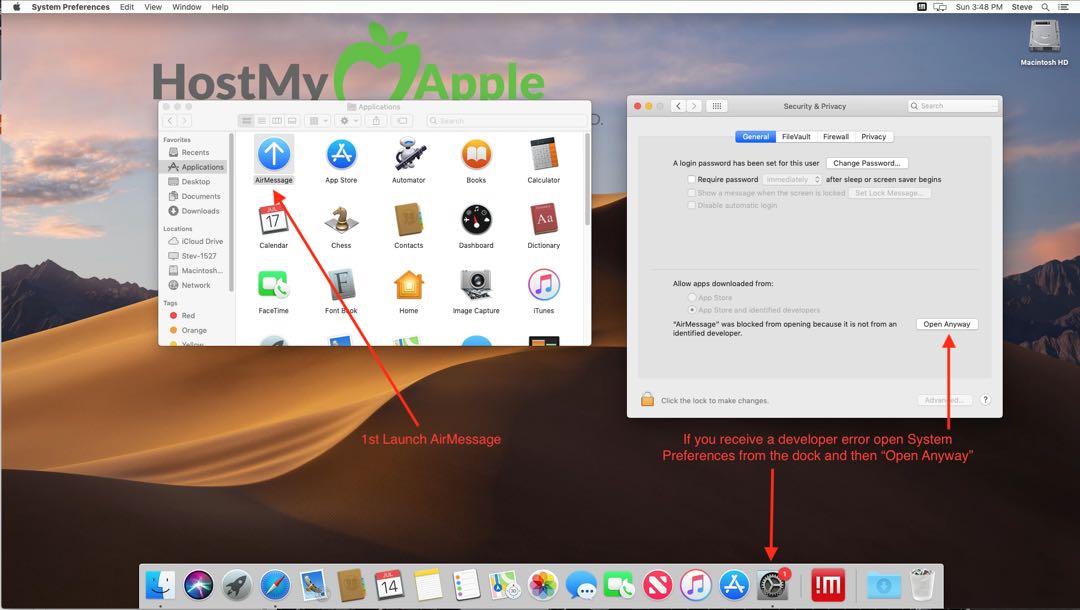
2d. Now, click the "Applications" folder and launch the AirMessage app. If you receive a notice about unidentified developers simply open "System Preferences" from the dock, click on "Security & Privacy" then click on "Open Anyway"
Step 3: Configuring AirMessage Cloud Server.
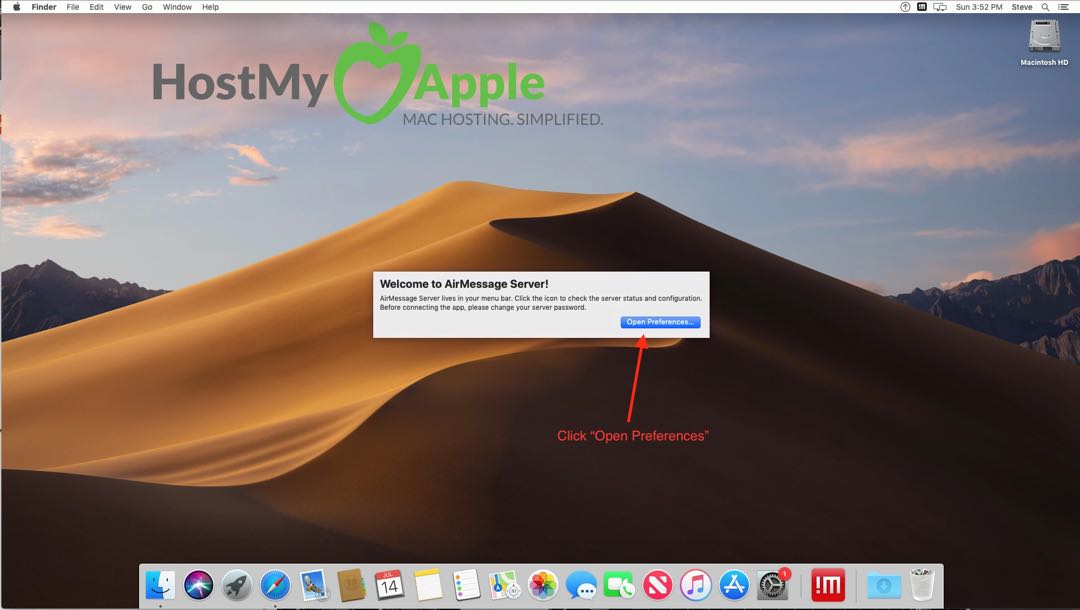
3a: AirMessage will launch and present you with it's welcome screen. Click on "Open Preferences"
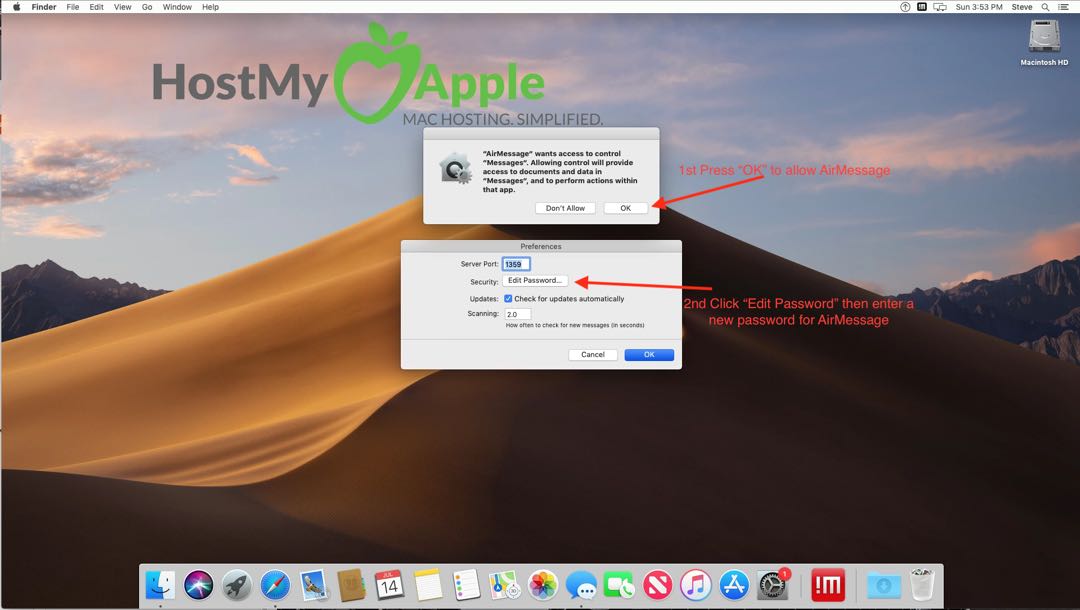
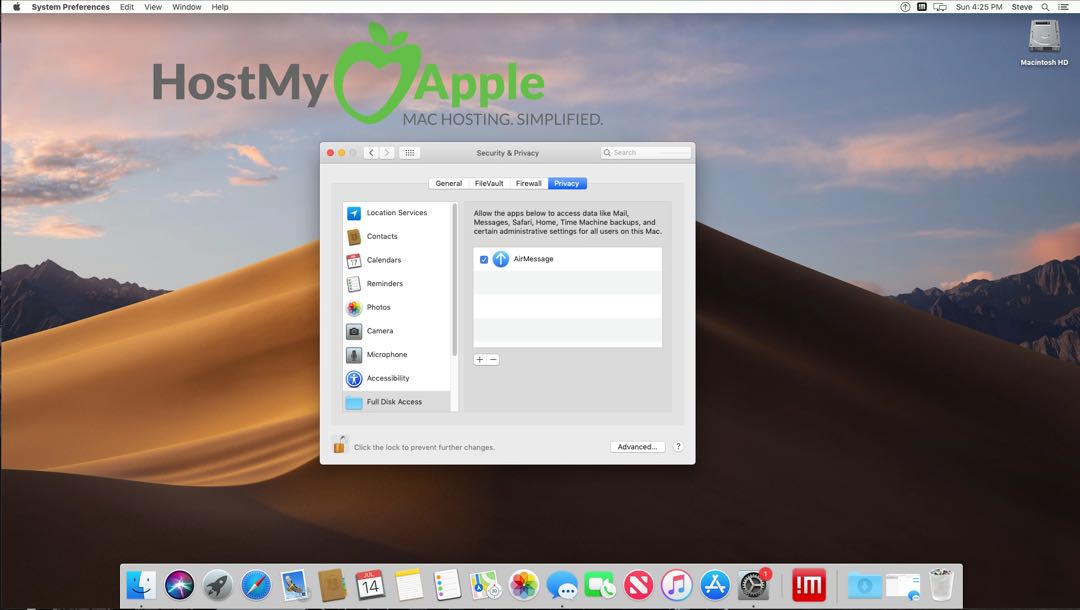
3b: A dialog box will appear asking you to confirm you wish for Air Message to control Messages, select "OK"
3c: AirMessage comes with a default password set, lets change that by clicking "Edit Password" and then enter in any password you wish.
4d: Take note of your AirMessage "Server Port" in our case it's "1359" This will. be used later when configuring the AirMessage Android app.
4e: You will need to allow AirMessage automation access to macOS in order for in to send and receive messages.
Navigate to System Preferences -> Security & Privacy -> Privacy -> Accessibility
Click the "+" button and Select AirMessage:
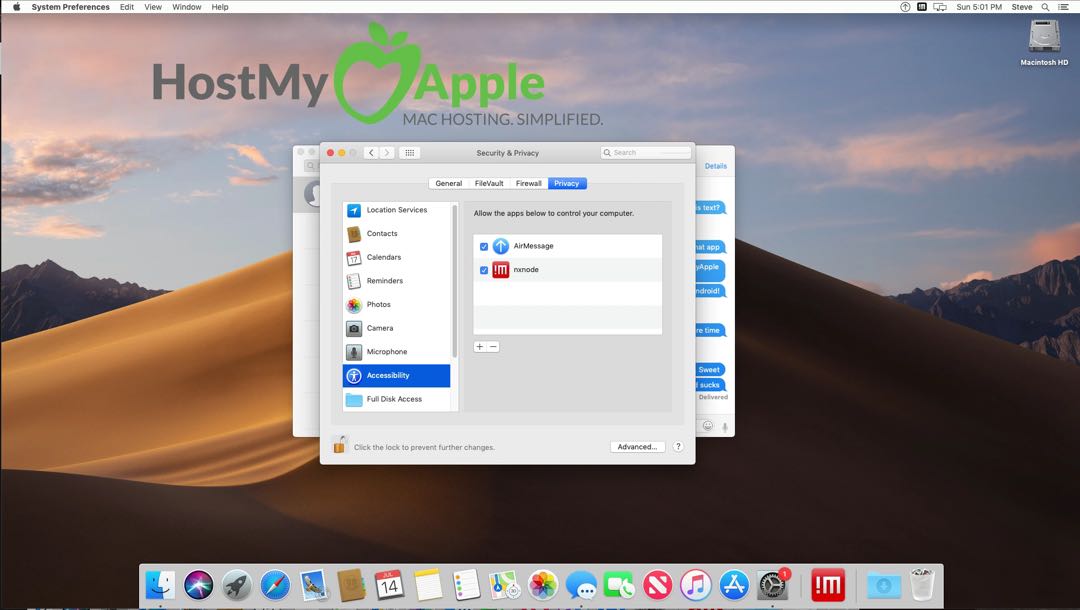
4d: You will also need to do the same under "Full Disk Access":
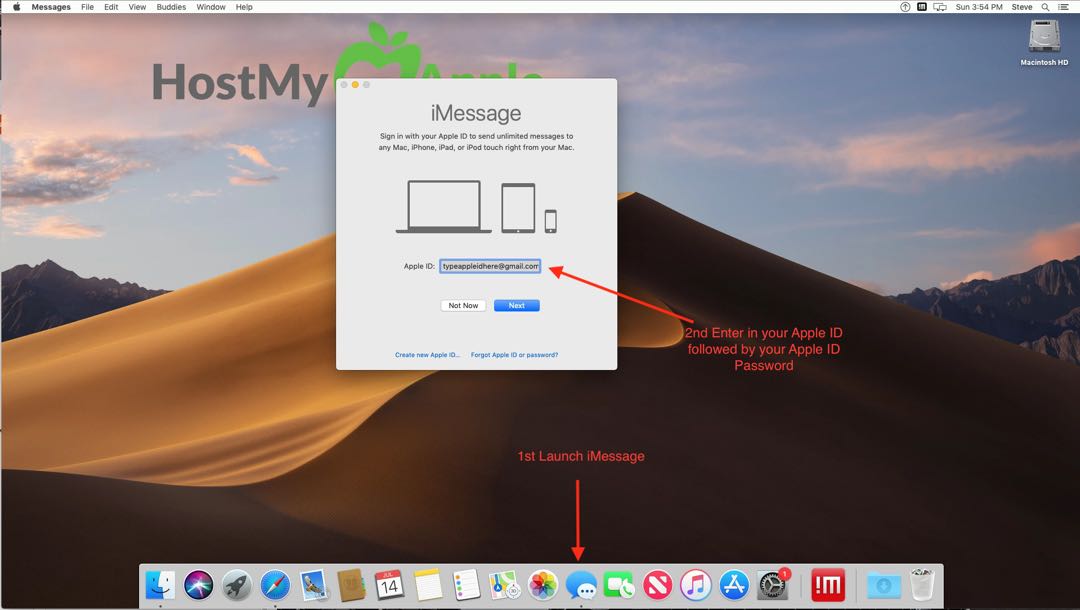
Step 4: Signing into iMessage:
4a: Launch "Messages" from the server dock and then Sign in with your Apple ID and Apple ID Password
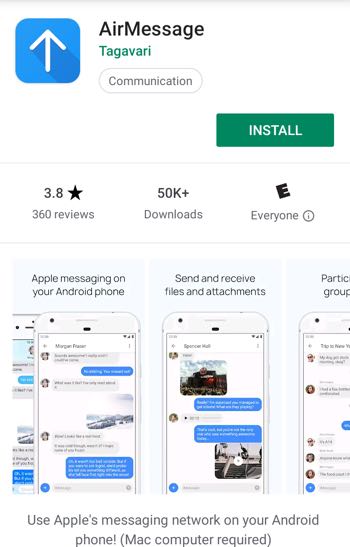
Step 5: Install AirMessage on your Android device:
5a: On your Android device open up the Google Play Store and search for "AirMessage" and click "Install"
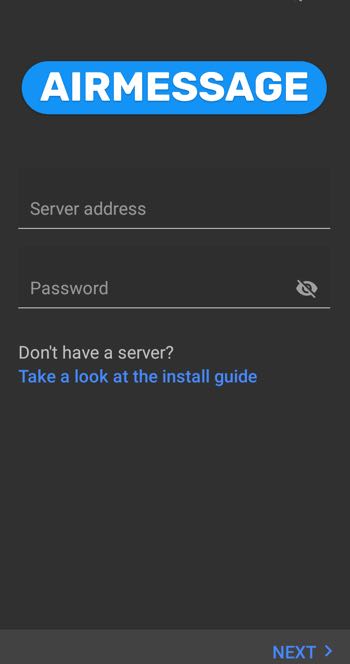
Step 6: Configuring AirMessage on your Android Device
6a: Once AirMessage has been installed on your Android Device enter in the IP address of your HostMyApple macOS cloud server that you received via email back in Step 1.
Then, enter the password that you chose for AirMessage in Step 3.
Step 7: Enjoy iMessage on Android!
That's it! You're now able to send text or picture messages to any iOS device including, iPhones, iPad's and Macs!

We hope you've found this article helpful. iMessage is one of the top requested features for Android devices and we're happy our macOS cloud servers allow such a smooth integration with AirMessage on Android. If you have any questions or comments about this article feel free to contact us using the link at the top of the page :)


