
In this tutorial I will be showing you how to configure your Remotix application in regards to accessing your HostMyApple macOS VPS. Remotix has a 15 day trial and a paid version. I personally love using Remotix. Continue reading below and we will show you how to configure yours today.
www.nulana.com
- Lets begin by naviating to www.nulana.com
- Once you get to the website simply select download 15 day free trial or purchase.

Remotix
- Once you have successfully installed Remotix your screen should look similar to the screenshot below.

Configuring your VPS Connection
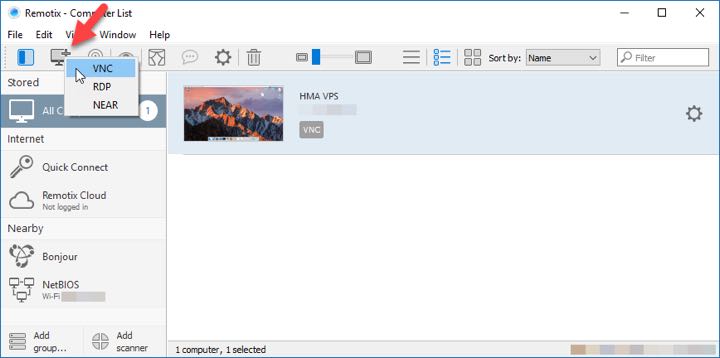
- Lets start off by selecting the “monitor+” icon and select “VNC“.
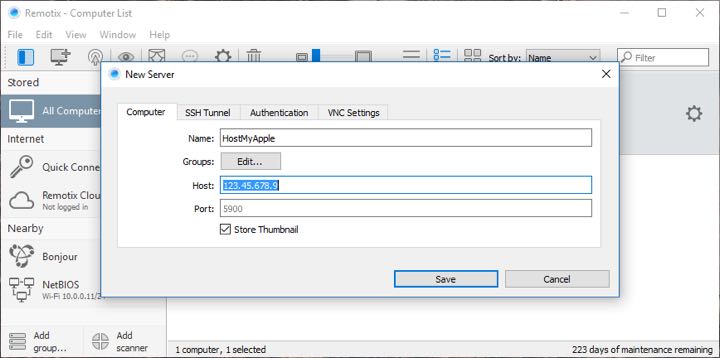
New Server “Computer” Tab
- After you selected “VNC” you will be brought to a screen like the one listed above.
- Personalize your VPS and give it a “Name” and provide the “HOST” IP address for your HostMyApply VPS.
New Server “Authentication” tab
- We will now navigate to the “Authentication” tab
- Select “macOS Login (Apple Only)“
- Provide the “Username” your macOS utilizes
- Lastly fill in the “Password” for your macOS VPS

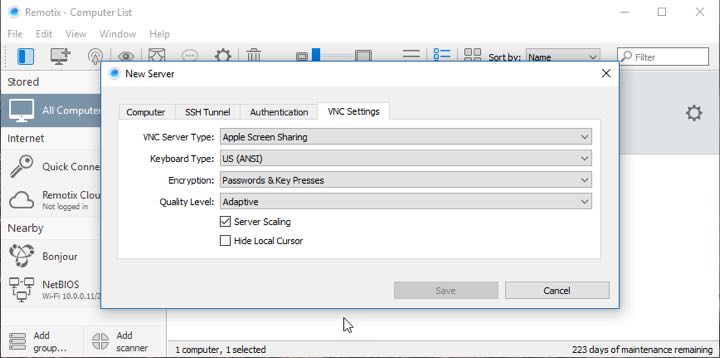
New Server “VNC Settings” tab
- “VNC Server Type” – Apple Screen Sharing
- “Keyboard Type” – US (ANSI)
- “Encryption” – Passwords & Key Presses
- “Quality Level” – Adaptive
- “Enable” – Server Scaling
- “Save”
Remotix Configuration Complete
- Double-Click your newly created HostMyApple VPS connection and enjoy

Published
June 26, 2022


