
How to setup OpenLDAP on macOS Sierra
What is OpenLDAP?
OpenLDAP is a free, open source implementation of the Lightweight Directory Access Protocol (LDAP) developed by the OpenLDAP Project. It is released under its own BSD-style license called the OpenLDAP Public License. LDAP is a platform independent protocol. LDAP is also used to store your credentials in a network security system and retrieve it with your password and a decrypted key giving you access to the services. The Lightweight Directory Access Protocol is a directory service protocol that runs on a layer above the TCP/IP stack. LDAP is referenced as lightweight because it is a smaller and easier protocol which was derived from the X.500 DAP (Directory Access Protocol) defined in the OSI network protocol stack. Lastly, LDAP is a software protocol for enabling anyone to locate organizations, individuals, and other resources such as files and devices in a network, whether on the public Internet or on a corporate intranet.
10 Easy steps to setup OpenLDAP
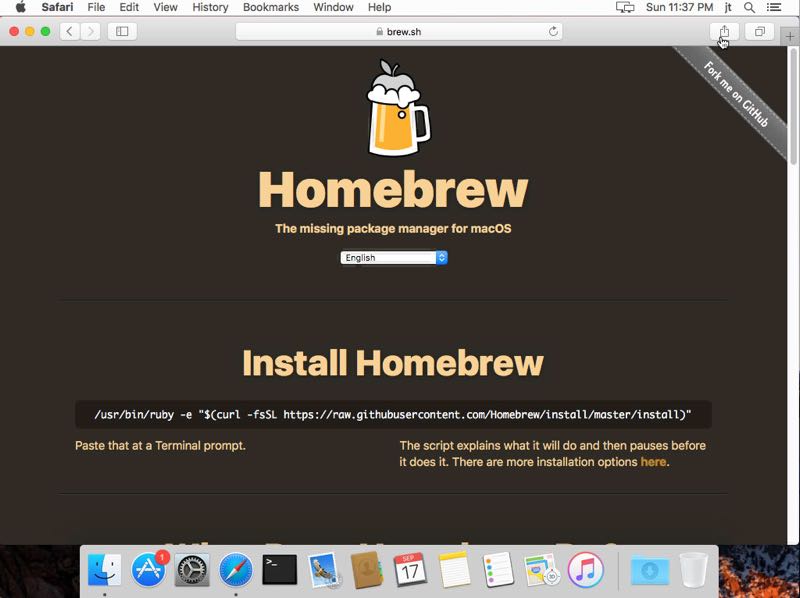
Step 1: Open your web browser and navigate to https://brew.sh/
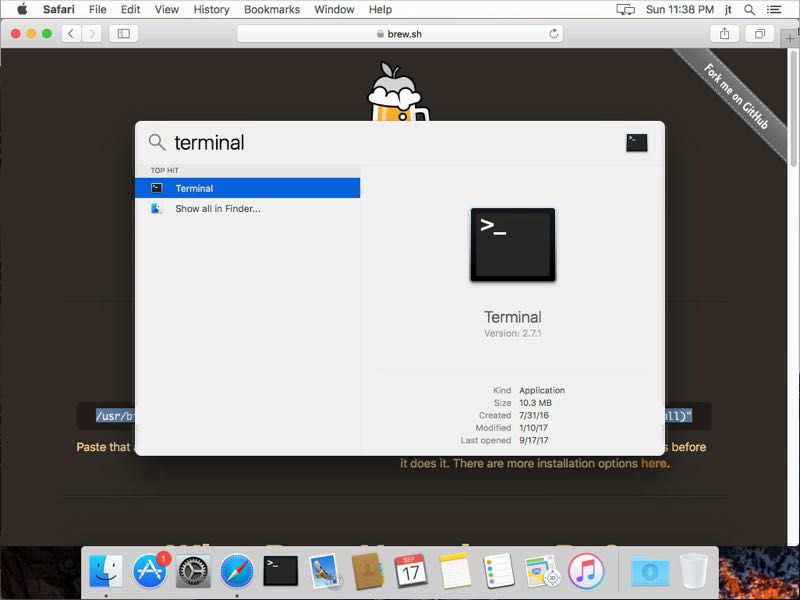
Step 2: Open up the “ Terminal “ application. (Applications>Utilities>Terminal)
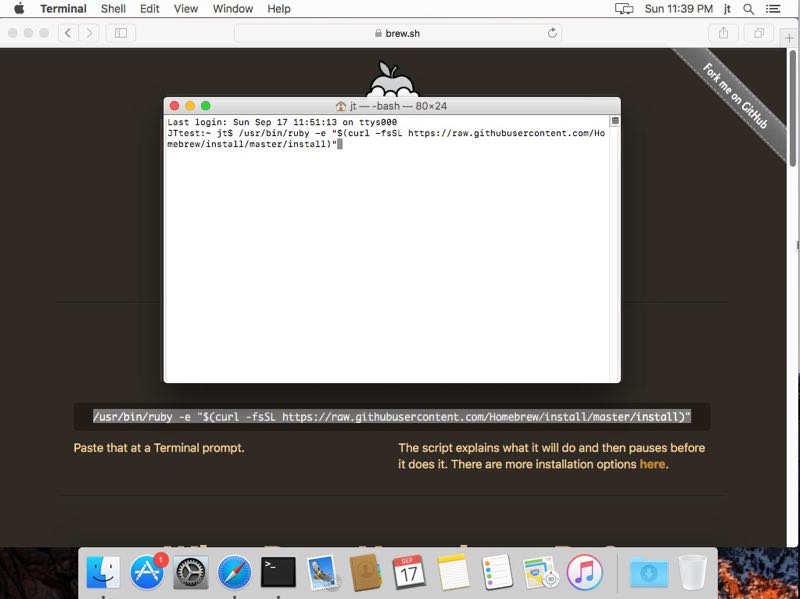
Step 3: Copy the script from the website: “/usr/bin/ruby -e “$(curl -fsSL https://raw.githubusercontent.com/Homebrew/install/master/install)”
Step 4: Paste the script into the “ Terminal “ and press “Enter”.
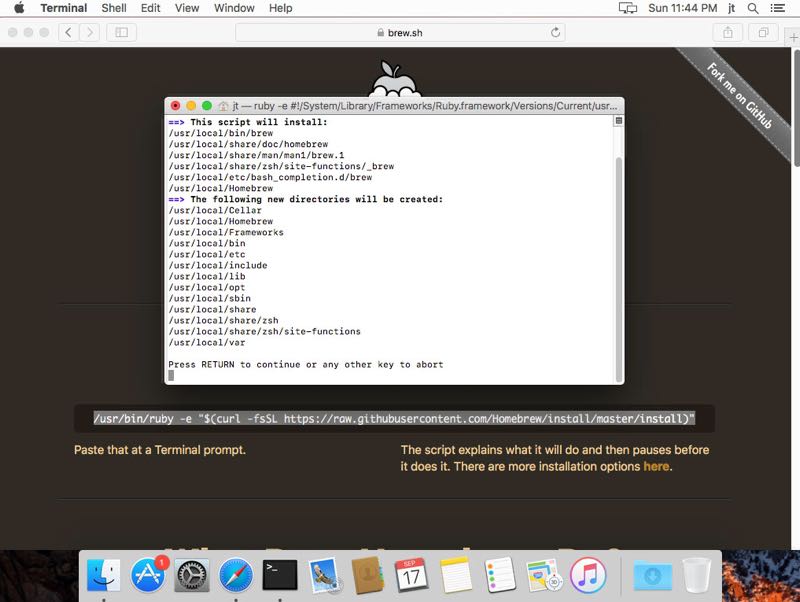
Step 5: Your terminal will explain what is about to be installed and what directories are about to be created. At the bottom of the terminal it should ask you to press, “Return” to continue.
Step 6: Enter your password for the “Administrators” account; then press “Enter”(you will not see characters as you type).

Step 7: After you have entered your password, Command Line Tools for Xcode will begin downloading and installing.
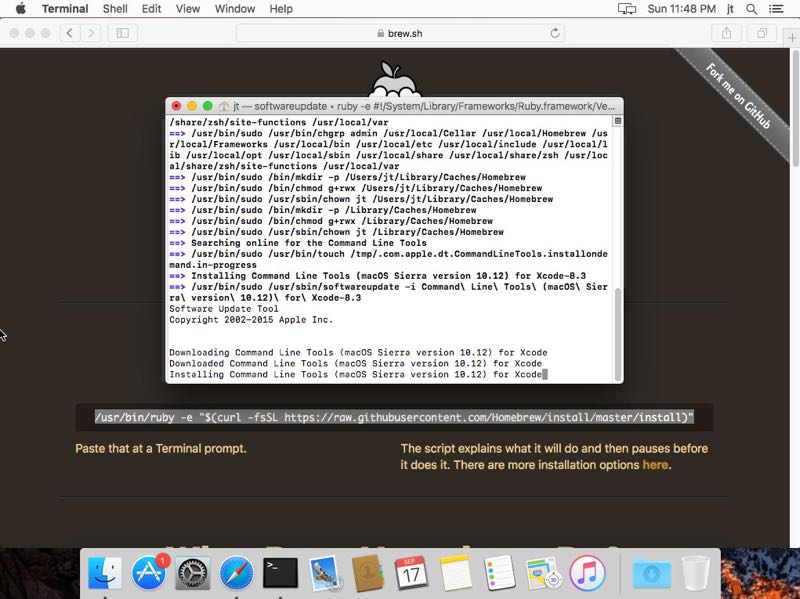
Step 8: When your Command Line Tools for Xcode installation is complete it will look like the screenshot listed below.
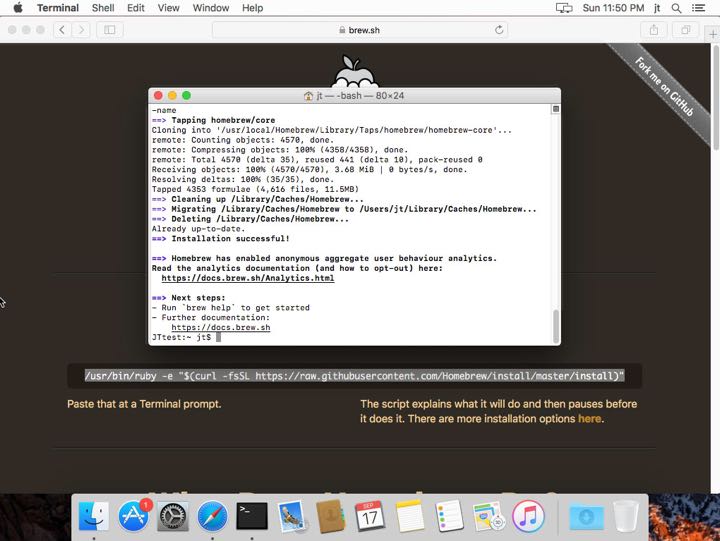
Step 9: Our next step after this is to install, “BerkeleyDB4 ”. Use this script to install the BerkeleyDB4,“ brew install homebrew/dupes/openldap –with-berkeley-db4”
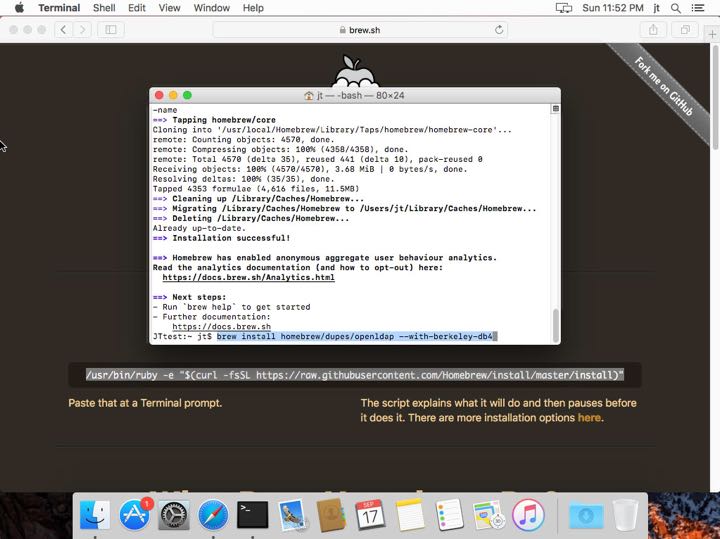
Step 10: When BerkeleyDB4has completed its install it should look like the screenshot below. Congratulations, you have now successfully installed Homebrew package manager, Command Line Tools for Xcode, and now you can begin utilizing your OpenLDAP.

Curious to check things out and dont own a Mac? We offer a variety of different specifications for your very own personal cloud server at www.hostmyapple.com. You could have your own macOS Cloud Server today for less than what you spend on coffee in a month. Feel free to explore and ask us any questions you may have.


